Today I would like to share a new product with you from Belle Gel, which I have been asked to review by the lovely Beth.
She has been with her trusted manicurist for many years, and that is a rather happy relationship... which means that she wouldn't really have the opportunity to do this justice herself. (Her manicurist... awesome, by the way...)
I have not purchased this kit, and I am not being paid for this review - nor am I affiliated with Belle Gel in any way. All thoughts are my own, and 100% honest.
Anyway, Belle Gel have created an affordable, at home, gel manicure kit - which is perfect for anyone who is looking for a longer-lasting manicure, or something to help their natural nails grow longer for an event. According to the website, the formula has been designed to help preserve the natural nail underneath. This is great to hear, as when I gave up having my nails done with gel at a salon, the natural nails underneath were trashed.
Also, a nice thing about doing it yourself at home. is that you can have your mani done at any time of the day or night! It is not always possible for people to get to a salon, and also, when you include backfills and removal costs, visiting a salon can be rather expensive over time.
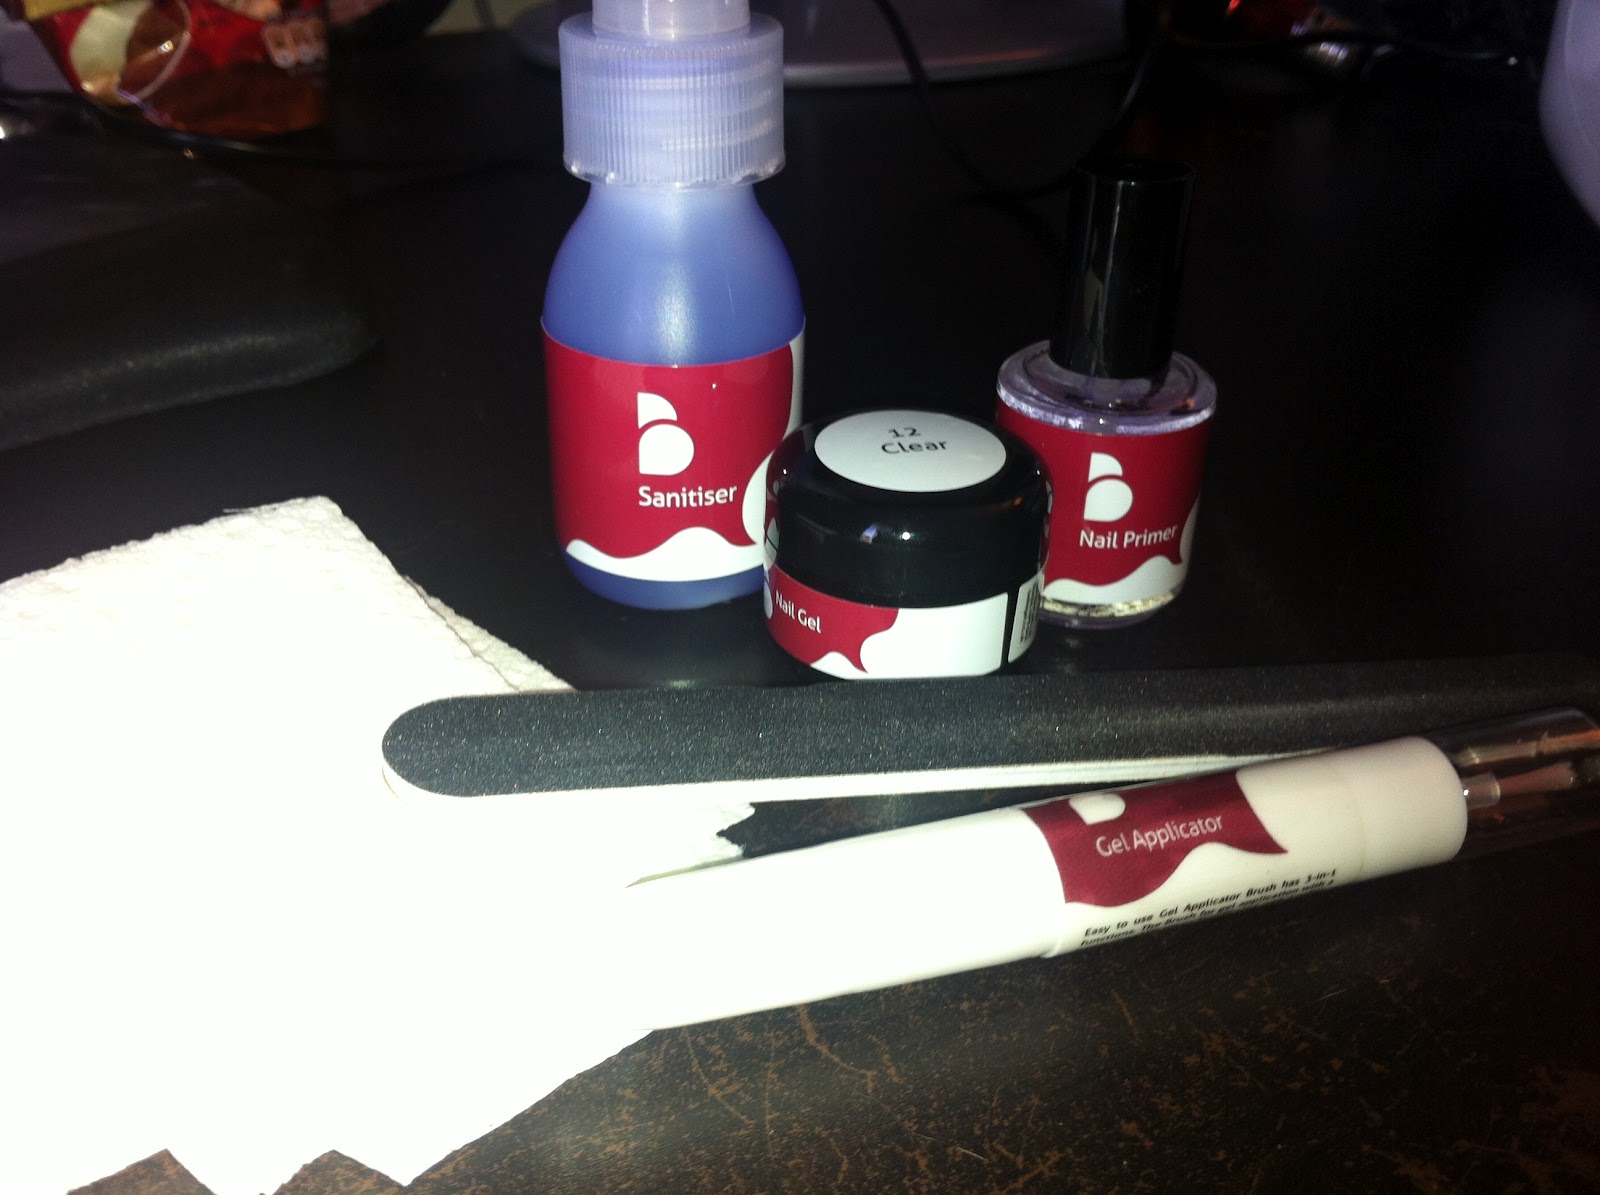
So... down to the kit itself.


I know that this is hardly a make-or-break factor, but I really like the fact that the packaging has been well thought out. The drawers make it easy to see where everything is, and I like that each product has a home. Sad, I know, but to me it makes a difference. It's easy to put away (rather than fighting with a box and KNOWING it won't go back in the way it came) which means I'll be able to store it neatly with my many other nail based

I started by cleaning and filing my nails in preparation for applying the gels. All polish was removed, cuticles pushed back and the nail itself gently buffed to remove shine and help the gel stick.
 | ||
| Gross, eh? |
An odd thing to add, but I really like the smell of the sanitiser...!
I chose to use the clear gel, as I foresee that I will end up painting over the gels within a few days. The kit also came with a red gel too, so I can vamp it up in the future should I wish :)
Once I was ready, I applied a thin coat of the nail primer over each nail, and allowed it to dry for around 30 seconds. Then, I was ready to begin with the gel application.
In all fairness, it was much easier than I had anticipated. The gel is really malleable, and applies easily. It is just like painting your nails... and I'm guessing we can all manage that! Using the clear, it was harder to see if I had managed complete coverage of the nail (whilst avoiding cuticles and bare skin) so I have got a few tiny gaps near the cuticle. It's not noticeable though, unless you are really close, and only I get that close to my nails! And lets face it, it's hard to be perfect on your first go!
The clear gel requires three coats in total. This can be pretty time consuming, especially with all of the curing involved.

Step One: Apply the gel to the little finger on your first hand, and cure it under the lamps for 30 seconds.
Step Two: Apply to the ring finger, and cure both nails under the lamp for 30 seconds.
Step Three: Apply to the middle finger and cure the three nails under the lamp for 30 seconds
Step Four: Apply to the index finger and cure all four nails for 30 seconds.
Step Five: Do your thumb! I would suggest doing the thumb on your opposite hand, then you can cure it with your fingers on your first hand!!
Essentially, it's rinse and repeat three times, and after your last time, you give your nails a five minute cure! The lamp itself will switch itself off after five minutes, so don't worry about timing it!
I applied relatively thick coats to my nails. The instructions don't suggest whether they should be thin or thick, so I went with my personal preference.
After the end-curing stage, wipe off any sticky residue using the sanitiser and a paper towel.

Then you are ready to add the supplied Supergloss Top Coat. It is recommended that you use the top coat provided, as this will protect the gel from staining, and your own top coat may not provide the same benefit.
 |
| Shiny, but still a bit gross. Yellow... ew! |
 |
| Much better! |
Overall Conclusion:
The kit is ideal for at home use. It's simple to use, easy to apply, and gives great results.
The Bad Bits: (get this over with first)
Erm... No indication as to whether it can be used in conjunction with false tips and the bulb in the UV lamp could have been stronger. Really, nothing bad, unless I want to be persnickety!
The Good Bits: (best for last!)
The price (especially compared to going to the salon), the simplicity, no foul smells or mess, the choice of colours included (and more available on their site), tidy and well thought out packaging, great brush for applying the gel (a bad brush is always a nightmare) and a fantastic finish to my nails.
I will come back to you and update this regarding wear time when I have had a chance to give them a good testing.
Roughly ten minutes after applying these, I had to wash my hair. Not something I would normally have done, but I had not planned my day sensibly haha. To be fair, they withstood that with no issue at all! I'm feeling confident that these will last really well!
So far, Nails and Tales recommends Belle Gel at home gel nails kit!
Additional Info:
Starter Kit £59.95 from www.bellegel.co.uk, currently with free postage and packing on orders over £40.
Additional gels (12 colours available) at £12.95 each.
So, do you like having a gel manicure? Would you, or do you already do this yourself at home? Let me know!
Thanks for reading,
Love Charlotte x
P.S. If you want to check out Beth's new blog, she is telling it like it is over at www.lifebybeth.com
thank you i've been want a gel nail kit for ages but didn't know what one to buy thank you ! x
ReplyDelete